Tuesday 28 October 2014

D is for Droid..

..our most favourite one,
Breaking it open
Was oh, so much fun!


Birthdays = pinatas around here. Actually, we will take any opportunity to make a paper mache object, fill it with candy, decorate, and then break it open for the candy!  I do most of the work - heaven  forbid any childrens get their hands mucky with the flour paste, but it is usually their idea and they help decorate.

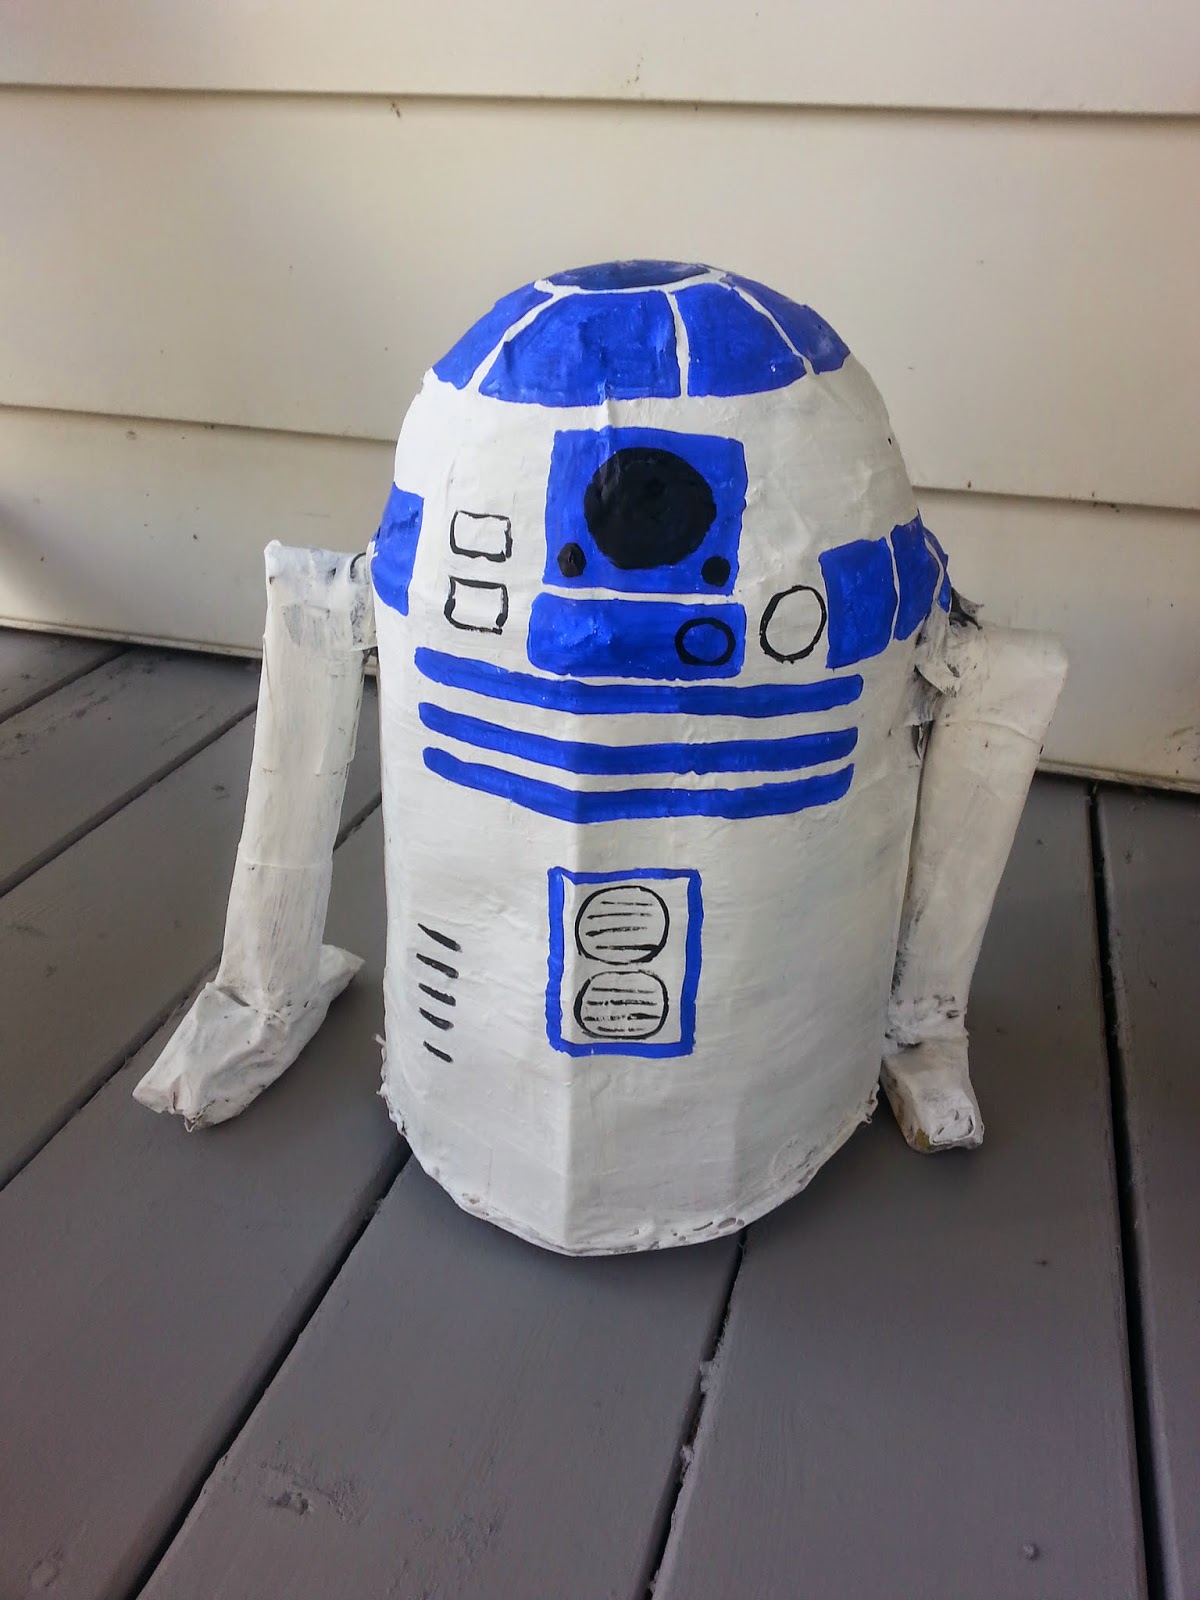
This time the request was for R2-D2.

I love Star Wars, but I also love sphere-based pinatas.  So simple and easy!  I always have a ton of balloons around.  But a non-sphere pinata?  I was a little apprehensive, but I love a challenge!


It was actually pretty easy!  It did start with a balloon (of course) and a club pack cracker box.  I rounded the box and taped it to the balloon.  Then it was paper mache time.  I did add a layer on top of the whole cracker box, just to help the box keep a round shape instead of staying rectangular.


I let it dry by placing it outside (time crunch - the breaking was to be the next day) and set the open-end box over a round bowl to help the round shape set. Warning - If you are doing a pinata that is just using a balloon, beware when putting it outside to dry in the heat - the balloon will expand and can break through the lovely paper mache you have just spent all that time pasting!
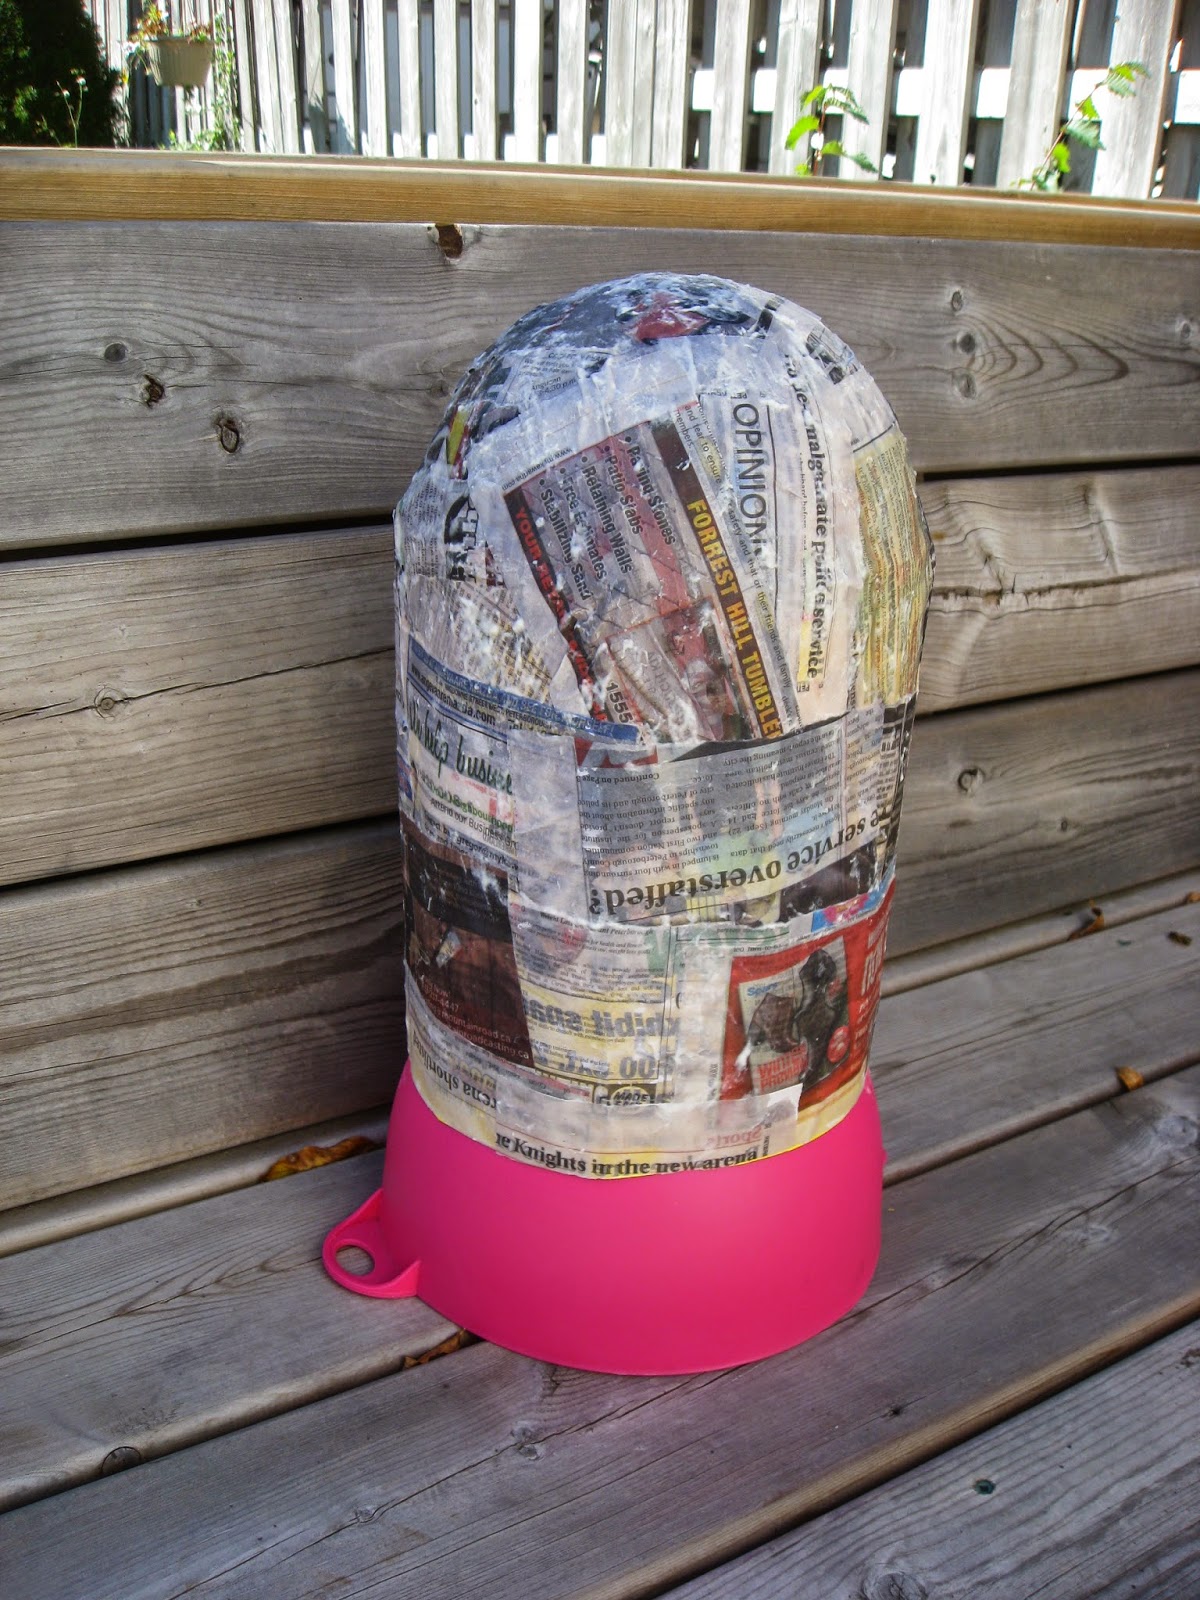
Quick dry outside


I made some simple "legs" too by rolling up newspaper and taping it into the desired droidy shape, and then a quick paper mache over to cover the folds.

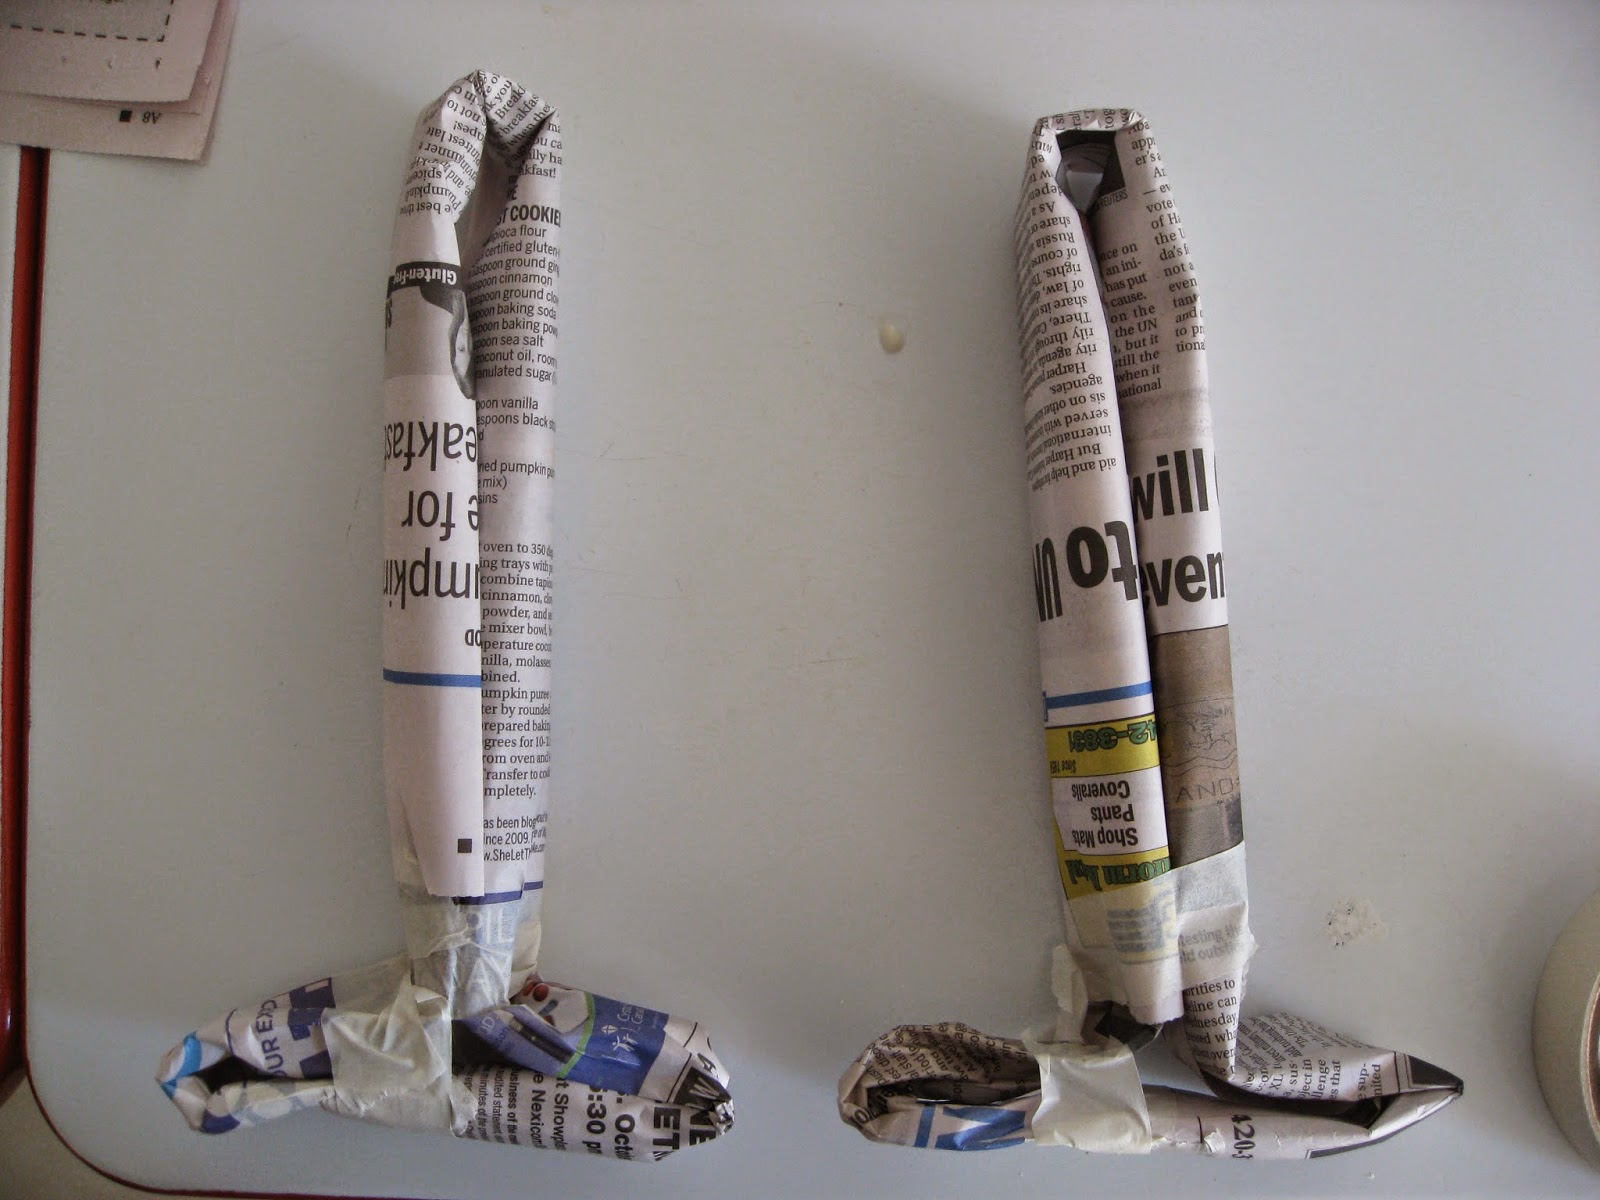
leg pic before the mache


I added the legs by punching holes in the droid body and the legs, using popsicle sticks and duct tape to join them together.  It is not my best work, but I just needed it to look decent and stay together until it got smashed apart.


Paint it white, then add some very quick details.  Try to make it wonky.  Adds to the homemade look.

Hot glue a white paper plate to the bottom after putting candy and some small pieces of tissue paper for extra fun.  Trim excess paper plate away.

Et voila!

Same pic as above - amateur blogger here!

Turns out that flour paste is surprisingly strong and the pinata broke where the paper plate was hot glued to the bottom, so we have an excellent condition droid to hang up somewhere!   Hurray for flour paste in all its mega-strong glory!  If I had known if would not break very easily I would have taken a bit more time decorating it!

Stay tuned for more Star Wars crafting...

Wednesday 1 October 2014

C is for Control panel...

..of a large rocket ship.
It has levers and buttons
that bloop, bleep, and blip!


Control panel the first

All last fall and winter these childrens and I dreamed about decorating their room.  Inspired by our favourite band which appeals to children and adults, They Might Be Giants, we really had no choice but to choose space.  The band has an album called "Here Comes Science" and when I saw it at my local library a little over a year ago, I did not know how much it would influence us!  My childrens  loved the song and video about the solar system, and that was our inspiration.
Video for youtube particle men planets
Video link over here---


https://www.youtube.com/watch?v=XI5nBUidKqo


They love Jupiter!  Anyway, this added to the sciencey love that my daughter already has for Earth, and we did their room as the Solar System. (pictures at a later post)  So as part of the space bedroom, their beds needed to be rocket ships of course!

Enter some large cardboard I had, some paint, small boxes and aluminum foil (Side note - we lurve aluminum foil and all the wonderful crafty things you can do with it! Wait, what?  It's meant for kitchen use?)

To make the aluminum foil controls, I just covered a box (cereal or similar) with foil.  The levers are made by first making a small ball of foil.  I put this on top of/above a small rectangle of cardboard.  Then I took a large piece of foil and covered the whole thing, so it would stay together.  Slice a straight-ish line into your foil covered box and insert lever.  Repeat!  Glue gun the foil box to the cardboard.

And here we are:
Control panel the second

Close-up of working levers
And they are *finally* up on their walls by the beds!  That was actually a challenge since the paint warped the cardboard so I couldn't tape them up.  I ended up punching holes in the top and bottom sides and used those sticky wall hook things.  Seems to work well!

*Note - I realize this is the second time I am posting about a life/craft project that is inspired by They Might Be Giants (and it likely won't be the last).  I am not affiliated with them in any way, we just really like them and their amazing science, math, and letter songs!  They inspire my kids to learn and that is super cool! Thanks TMBG!  


Thursday 25 September 2014

B is for Bunting..

..that hangs on the wall,
a beautiful rainbow,
Let's hope it won't fall.


I love making these.  I get to use colours and put them in order.  Funny, I don't like to maintain order in my home, but I do love the act of creating the order in the first place.  And then it falls to rack and ruin.  So let us celebrate this love of living, not tidying, enjoying the day, not constantly cleaning it up. Celebrate with bunting!


As messy as I can be, I am a perfectionist in other areas.  Like making things.  For instance, a fellow vendor at a craft show mentioned that if I just did a raw edge then I could make more bunting in less time.  But, but. I like the look of turn and topstitch!  If someone actually launders these, they will last longer!  Will people launder these ever?  It seems unlikely, but it is just a different look than the raw edge.  Don't get me wrong, I love a raw edge, but we get set in our ways, and this is just how I have been making the bunting.  A friend's sister asked for some made with a raw edge, made more simply, so they could cover more area for the same amount of money she would spend...I hadn't thought of that.  When I look at it that way, maybe I should switch how I make them. I have a friend her sells her one-of-a-kind art for very low prices.  It's because she wants more people to be able to enjoy them!  What a great thought.

And here are my raw-edge bunting.


Pile o'bunting


Tuesday 9 September 2014

A is for Animals

...or "aminals" as my kids say (and I choose not to correct).


I started this quilt back in January, working on it slowly, very slowly, but it is finally done!

These are the Ed Emberley fabrics in the centre.  I love these prints!  They are so cute.  I did not have the pleasure to grow up with the drawing books that Mr. Emberley created, but I am so happy to have discovered these images now!

I made 12 blocks, which makes for a large throw or a nice play mat quilt.  It could be used for a single bed (twin) but does not have much (or any) overhang, which I think is fine.  We don't make our beds here anyway since the blankets and pillow just end up being used for playing with.  Could this quilt inspire bed-making? (my quilt makes me want to make my bed...sometimes).  Wishful thinking!

Here are some money shots of the aminals (typo intentional):


 (Sorry for the sideways pics - not sure what is happening!)

I machine quilted it with straight lines, using an aqua thread.  Simple.

I machine quilted the binding too, with a zig-zag stitch.  I have heard a few people say they do this, on blogs and in person.  I really like the look!  I used a variegated rainbow thread and it really works with the quilt.  It also made machine binding less time-consuming.  A win-win!

Quilt stats:
41.5" x 61.5" (105 cm x 166.5 cm)
Warm and Natural batting (100% cotton)

Listed in my etsy shop.


Wednesday 27 August 2014

WIP Wednesday

Here is my first WIP post of the blog!  Let's see how long it remains a WIP. (I meant the quilt.  The blog is going to be an endless WIP)

I received a lovely old tablecloth from a lovely person who knows that I love them and like to chop them up to use.  And that is exactly what I did!


Chop chop!  Cutting around the stains, I saved the good parts, which were many.  I did some patchwork with colours of new fabric - colours pulled from the tablecloth print.  I wanted to have more than just the pink and green however, so I added a print from the pearl bracelets line.  I love this shade of green-blue near the olive green.  A bit of a weird mix, but I love it.

I added a bit of embroidery with the greeny-blue colour to try to tie it in better, but I think I may save this square for something else...
Needs more detail...

 I am using this little lady though!


Ah, to dream in a field of giant flowers...

I would love to set a deadline for this piece, a finish by date...How about...Sept. 25?  That's random.  We'll see.

If you are reading this by way of a WIP link from another blog, thanks for stopping by!  Hopefully I will have much more to offer in the weeks and months to come!

Thanks for reading!

Linked to WIP Wednesday at The Needle and Thread Network

Tuesday 12 August 2014

Tuesday is for Triops

Do you remember the band They Might be Giants?   (Particle Man, Istanbul (Not Constantinople), Birdhouse in Your Soul...)  I was a kid when I first heard of them, and now my children are fans too.  They got hooked (and myself re-hooked) with Science is Real.  Love it!  Love It All!!!  I could go on and on about how amazing the whole album is (I am not getting paid to gush here, folks!)  Please, take a listen to just one of these gems...


https://www.youtube.com/results?search_query=i+am+a+paleontologist

Then we borrowed Here Come the 123s from the library.  Hooked again!  We loved watching the videos too.  This one really caught our attention...  Triops Has Three Eyes


And this lead to finding out about Triops - and what do you know?  Triops is real (I suspected They Might Be Giants would be speaking the truth).  We sang about Triops for days.  Then came the question from my six year old - "Can we have a Triops for a pet?"  I didn't know, but after a quick internet search, lo and behold, you CAN have a Triops for a pet!

I see you seeing me...

It was ordered.  Then we waited, and waited, and waited. "Is Triops here?"  "When will it get here?"  "Is it here yet?" "No, I just ordered it this morning!"

Well, here it is!

And so we wait again for the hatching...  Updates will follow!


Sunday 16 March 2014

Figuring it Out

My brain that is.  Well, I have some parts of my brain figured out.  I have had this same brain for awhile now, so this is good.  You see, I am a procrastinator!  Big time.  I already knew that part.  I am also a planner, which means I get grand plans (and not so grand) and I love starting a project, but completing it...not so much.  SO much more fun to start something new!  Which is why these pillows have been waiting for one final, simple stitching since the fall, until this morning.


And what was my motivation?  Not wanting to read from my text or do my coursework.  At least I am not just watching some shows (that was the other night).  These pillow covers will be up for sale soon in my etsy shop, in a few days.  Why not now? I have work to do people! (or maybe a kitchen to clean...)

Saturday 4 January 2014

Time for Retrospectication!

Happy New Year!
Off to a slow start blogging, but that's okay.  The tortoise won the race, and this isn't a race anyway.  Good thing!  And I guess it is time for a bit of looking back.  

Crafty-wise, I have had a pretty good year!  Several winter shows around these parts, a few a bit further, and my first in Toronto!   I always love the social aspect of the shows, meeting and talking to shoppers and fellow vendors.  And when I am fortunate, I am make a few sales as well!  I used my Square reader the first time and it made me a few sales I would not have made otherwise.  Three cheers for technology and free wi-fi! ( I am one of the only people I know who does not have a smart phone.  Not in the budget).

I was in an excellent online charity quilting bee, but had to quit that in the summer due to some life craziness. I hope to re-join the do.  Good Stitches charity bee again in the future, but I am involved in my community a bit, and with little ones around, it leaves precious little time! 

Here are some photos of some things I made this year. 


Small wall hanging for my newest niece.

Stilt-walker pants for the fabulous stilt-walker in the lantern festival in Prince Edward County.  
And now for the public declaration of my goals for 2014:

- Blog more (already tied with last year's blog posts!  Yes!)
- Refashion more (or rather, take photos and post about it)
- Make quilts for my kids, then expand my repertoire beyond wonky log cabins and block within block
- Make some not-mainstream clothing.  Not that my current skirt makes are terribly mainstream, but I have     some ideas a bit more out there
-Continue doing shows!
-Do some more arty fibre art/wall art type things

Best to stop here.  Also, I need to cut this short and get back to organizing.  I want to create, but the house is a disaster and it needs attention before all my ideas. It is so unfortunate to have grown-up priorities.